Editing The Website
This page serves as a step-by-step guide to introduce you to editing the website.
It will teach you the basics of Visual Studio Code, git, and GitHub required for working on the website.
Open Visual Studio Code
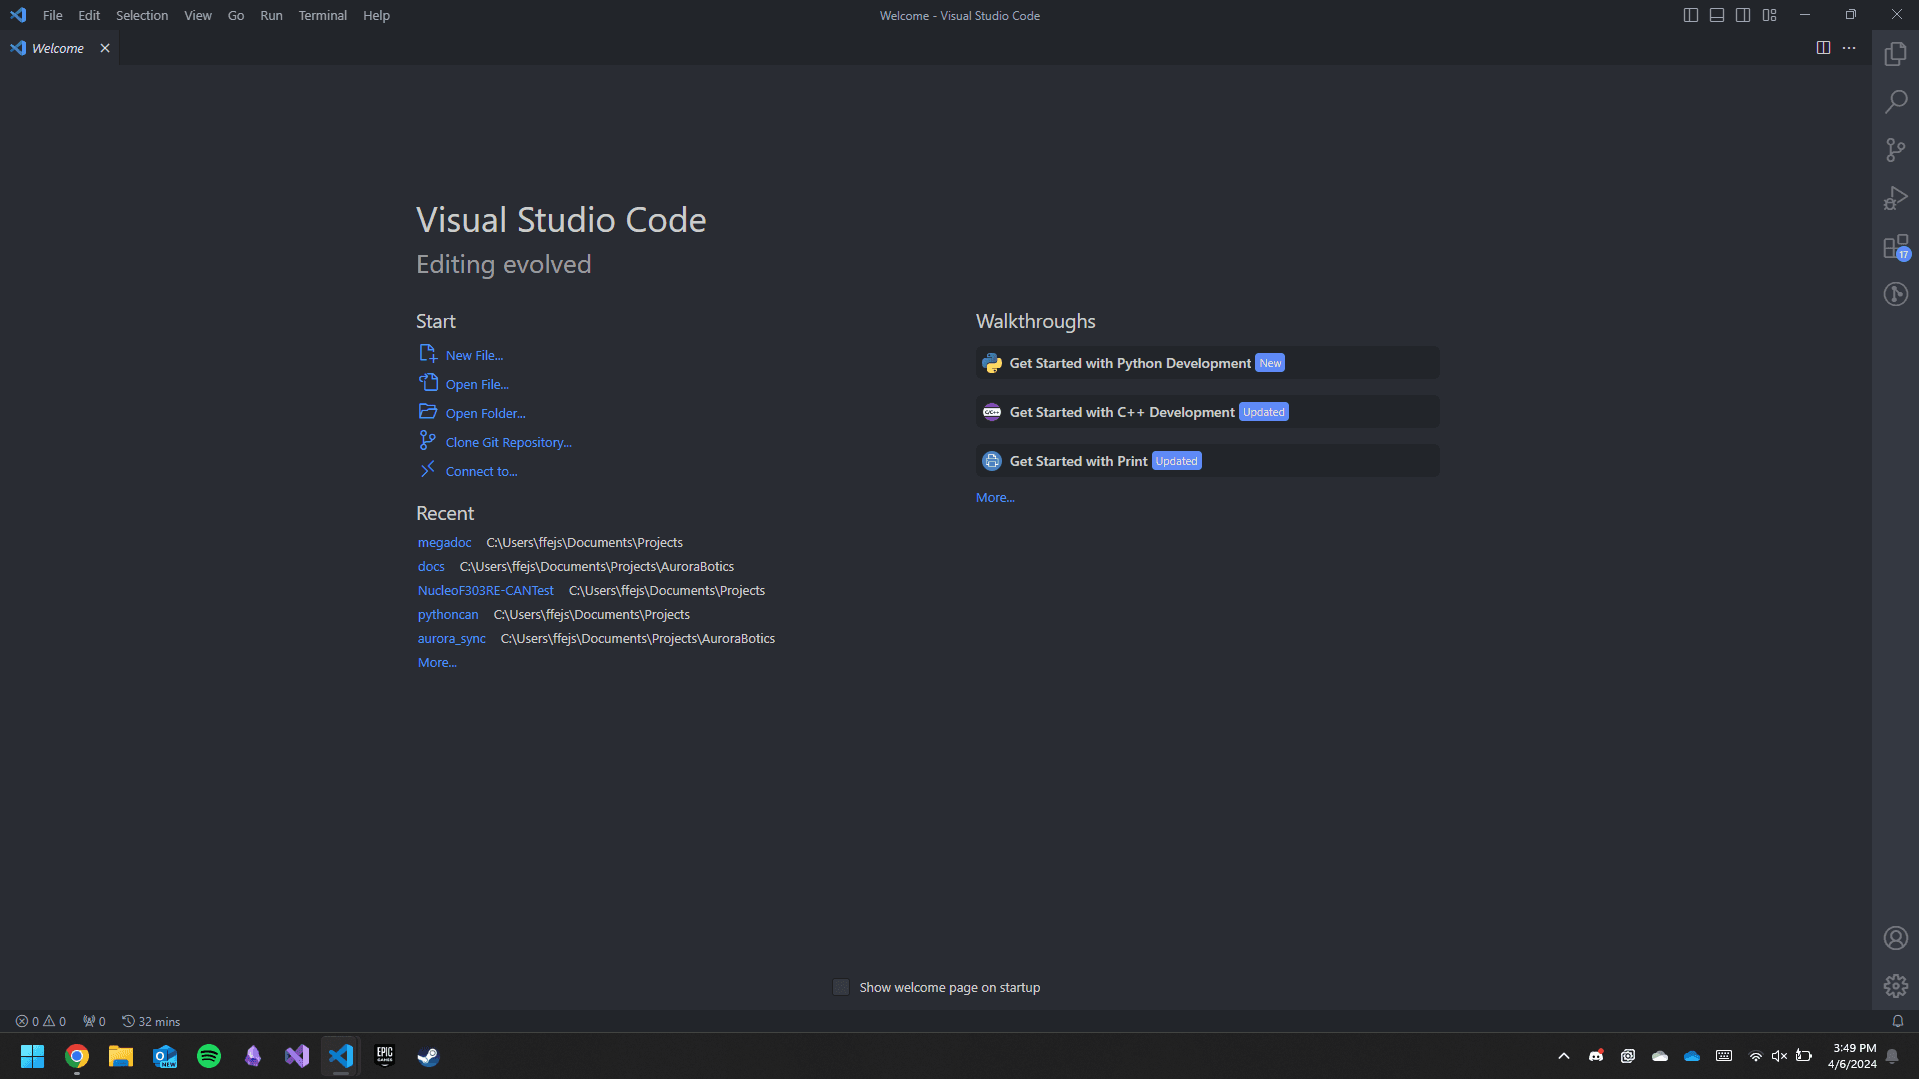
Once open it should look something like this:
Set your git credentials
Git needs to know who you are. Git tracks who makes what changes, so before you can actually make any, you have to tell it who you are.
To do this:
- Press ⌘` or ⌃` or click
View > Terminalto open the terminal. - In the terminal window you need to execute the following 2 commands:
git config --global user.name "Your Name"git config --global user.email "youremail@example.com"
- To do so, copy and paste each command into the terminal, make sure to change
Your Nameandyourname@example.comto your actual name and email. - You will have to move the cursor with the keyboard! Press enter to execute the command.
![]()
If you did everything correctly you should see no errors, like the image.
Clone (download) the project from GitHub
Git is a tool which tracks changes to files, it also tracks who makes those changes. GitHub is a website which holds the information git logs, along with the files it is tracking in a remote "repository", so multiple people can access it and change files at the same time independently. Cloneing is the process of downloading this repository to your computer so you can make changes yourself.
To do this:
- Press ⌘⇧P or ⌃⇧P or click
View > Command Paletteto open the Command Palette and search forgit: Clone, once it is selected, press enter.

- Next it will ask you for the url of the repository you want to clone, copy and paste the following
https://github.com/tigerbotics7125/website, then press enter.

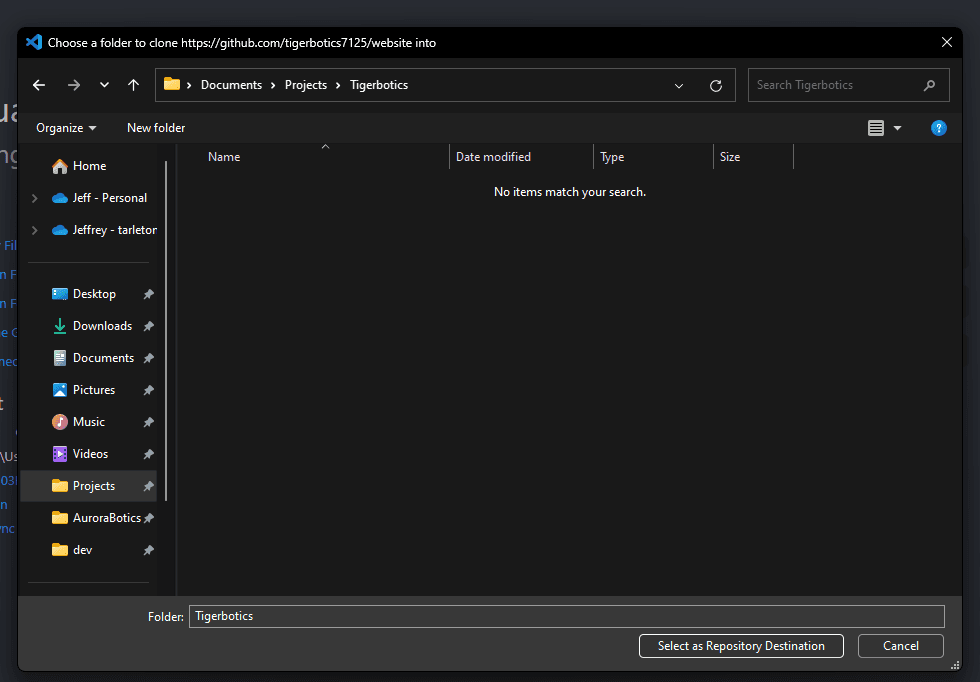
- Next it will ask you where to put the project folder, pick a location, then select
Select as Repository Destination.
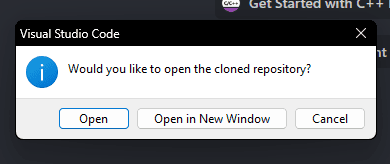
- Finally, it will ask you if you would like to open the folder, go ahead and select
Open.
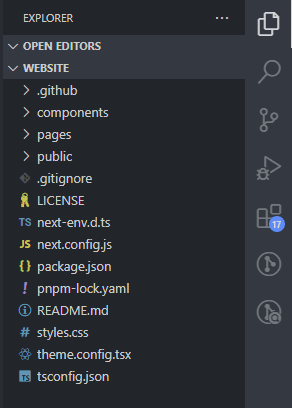
- If everything has gone correct, vscode should reopen, and all the project files should appear in your file explorer.
Make a branch to edit your files on.
When making changes to a repository, you "commit" them to it, allowing git to keep track of who changes what.
By default, this all occurs on the main branch. In our case the main branch is what is published to the website, so we cannot simply commit every change to main, changing the website without reviewing our code first.
In order to allow for editing the website without permanently changing what is public, we can use a different branch to preview our changes before making them (mostly) permanent.
So what we are going to do is "branch" our changes from main, and once we are happy with them we will merge them back into the main branch making them public.
- Open the source control tab in the sidebar
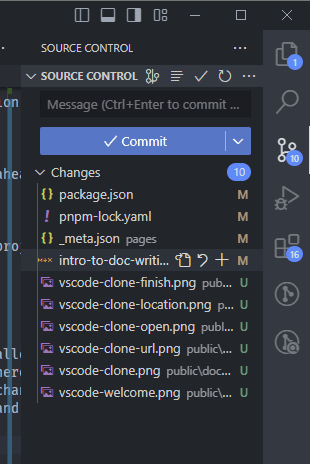
- Click on the 3 dots, then
Branch>Create Branch...
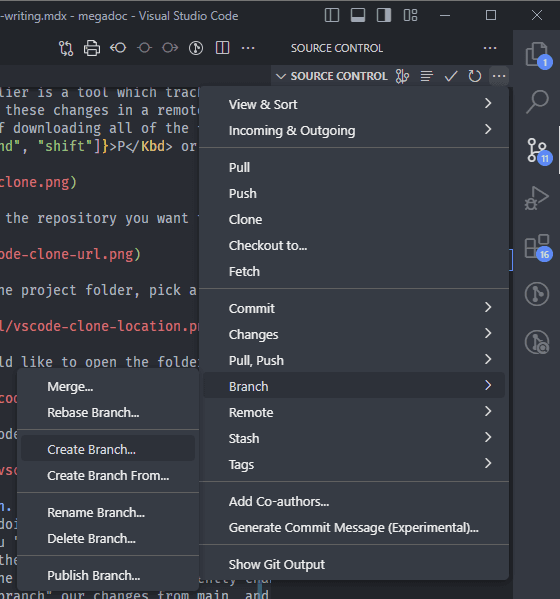
- Then pick a name for your branch, ideally you should make a new branch for each page or topic you write on. Be sure to name the branch something descriptive towards your changes. After you choose a name, press enter.

- After you've done this, you should be able to see your current branch in the bottom left.

Make your changes
At this point, you can make changes, add pages, do whatever you want.
Previewing your changes locally
If you have administrative privileges on your computer, you can run the website on your computer, this will let you test it before you commit any changes.
In order to preview your changes locally:
- Open the terminal with ⌘` or ⌃` or by clicking
View > Terminal. - Run the command
pnpm iin the terminal.- This will install all the dependencies the project needs.
- Run the command
pnpm run devin the terminal- This will start the web server, you should see something like the following in your terminal

- Access the website at http://localhost:3000/ (opens in a new tab) in your browser.
- The website will compile each page as it is required, so it may take a while to go to new pages, you should be able to see what the website is doing in the terminal.
- When you change a file, and save it, the website should automatically refresh (after it compiles again).
Committing your changes
Once you are happy with your changes, you'll want to commit them to your branch.
To do this:
- Open the Source Control tab again.

You'll see a list of files which have been added, modified or deleted. When you hover over a file you can "stage" it by pressing the + button, or you can stage all files by clicking the + beside "changes".
- Stage the changes you wish to commit to your branch.
- Add a commit message in the box above, something descriptive about your changes, such as "added x doc". After you do that, press the blue commit button.
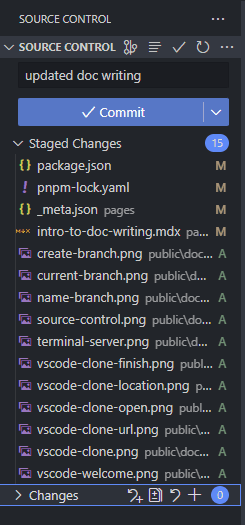
Once you have committed your changes, you need to push your changes (send it to github)
- Push your changes by clicking on the three dots, then
Push.- If it prompts you to publish the branch, that just means github doesn't doesn't know of your branch yet, go ahead and publish it.


After you push your code you should be able to see it on GitHub here (opens in a new tab). You can click the dropdown beside main to see all published branches. Your committed changes are available under your branch which you just published.
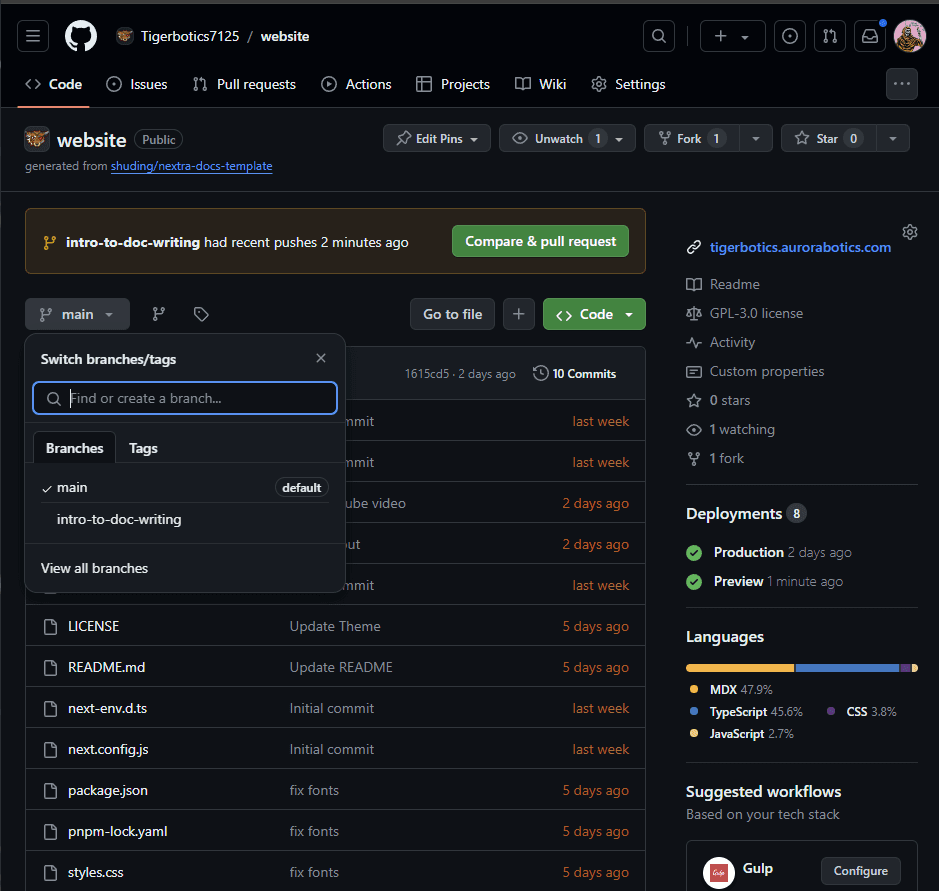
Creating a pull request & previewing your changes
We are finally nearing the end, where we can get your changes pulled onto the main branch (and published to the website).
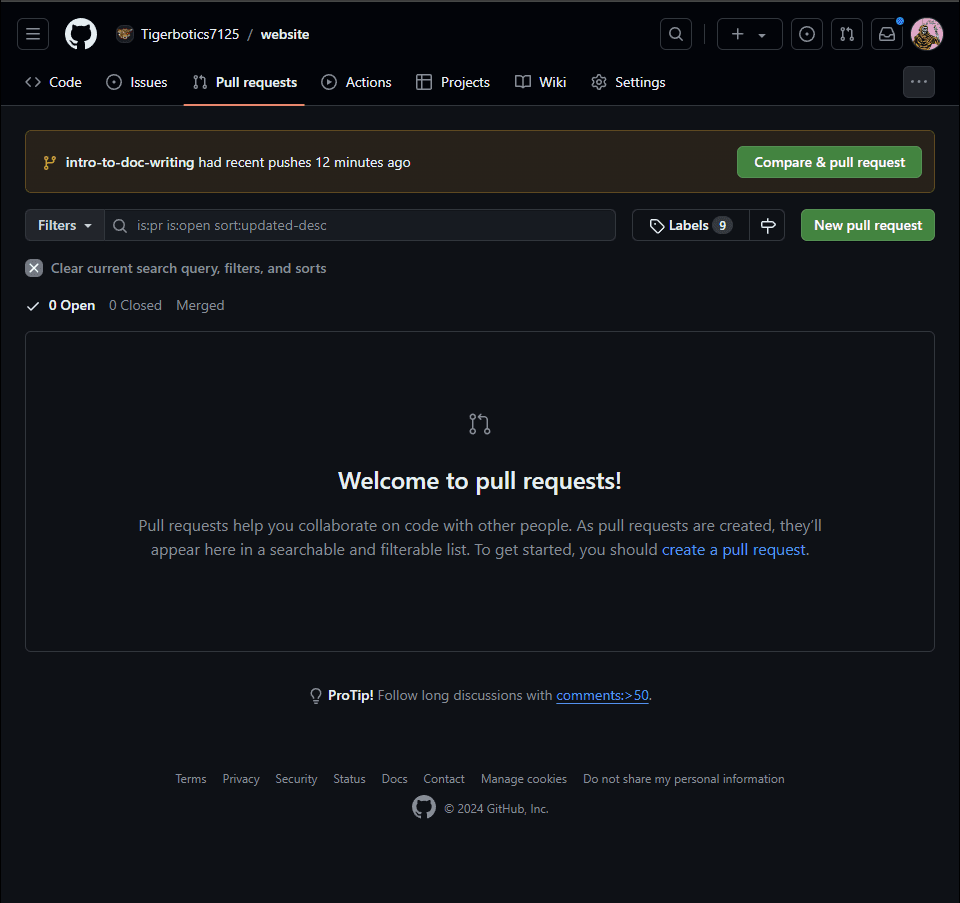
- Navigate to the pull request tab on the repository on GitHub or you can click this link (opens in a new tab).
- Click on the
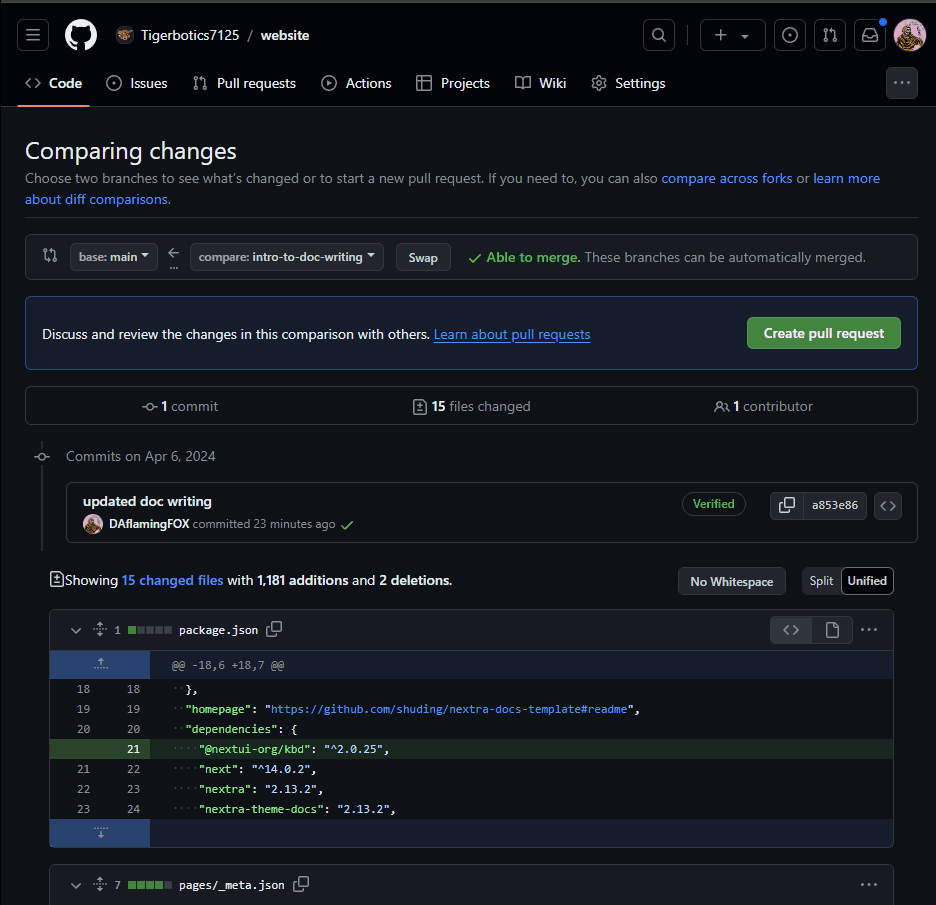
New pull requestbutton, this will open a page which compares your changes, leave the base as main, but change compare to the branch you want to pull into main. This should pull up all of the changes you did on your branch.
- Click on the
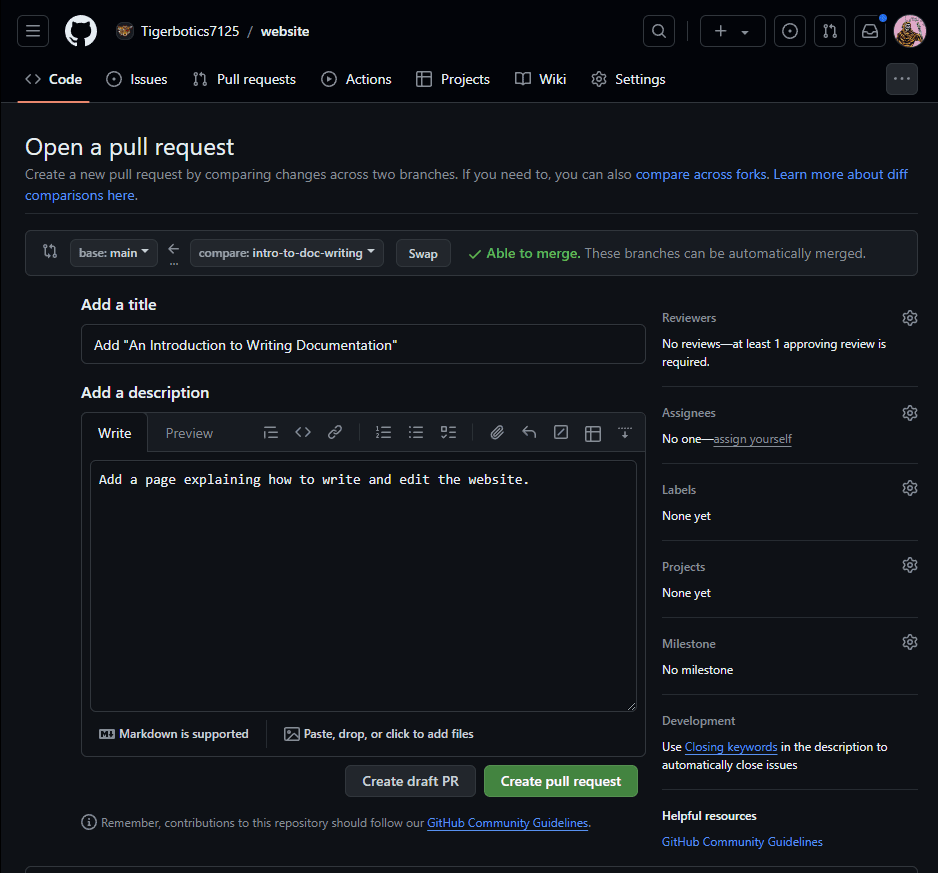
Create pull requestbutton, this will prompt you for a title and description, fill these in reasonably, once you have done that, clickCreate pull request.
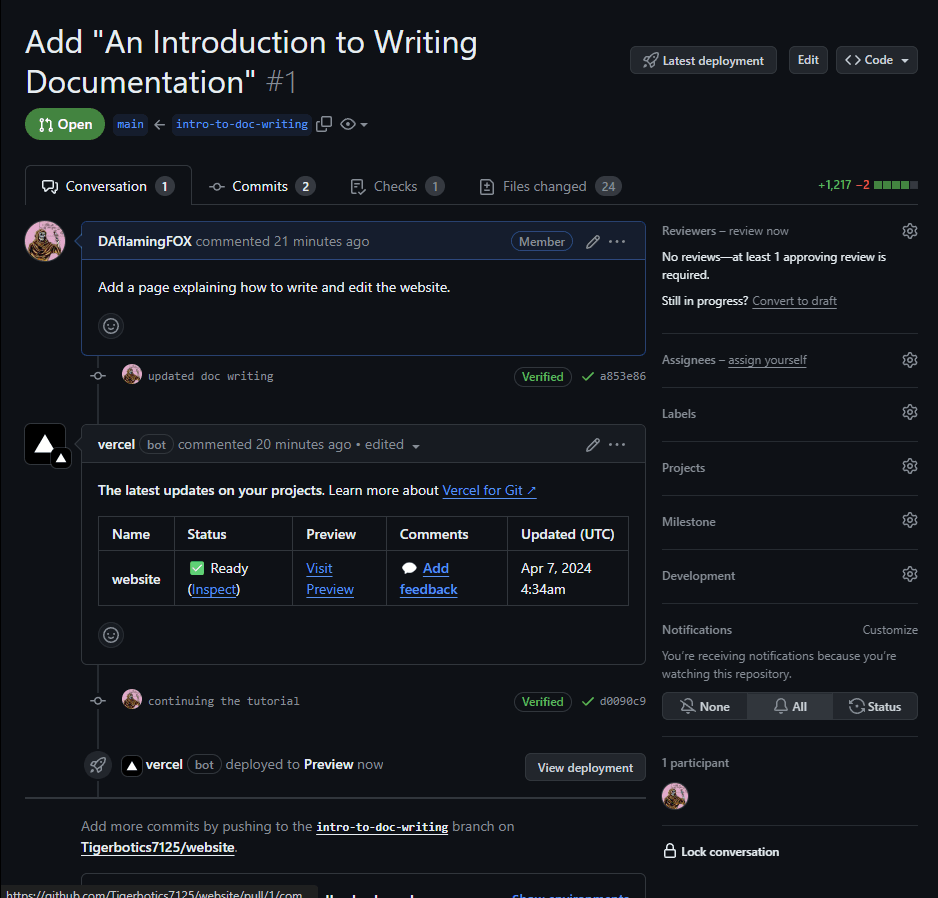
- After a minute or two, the vercel bot will comment on your pull request with a link to where you can preview your changes.
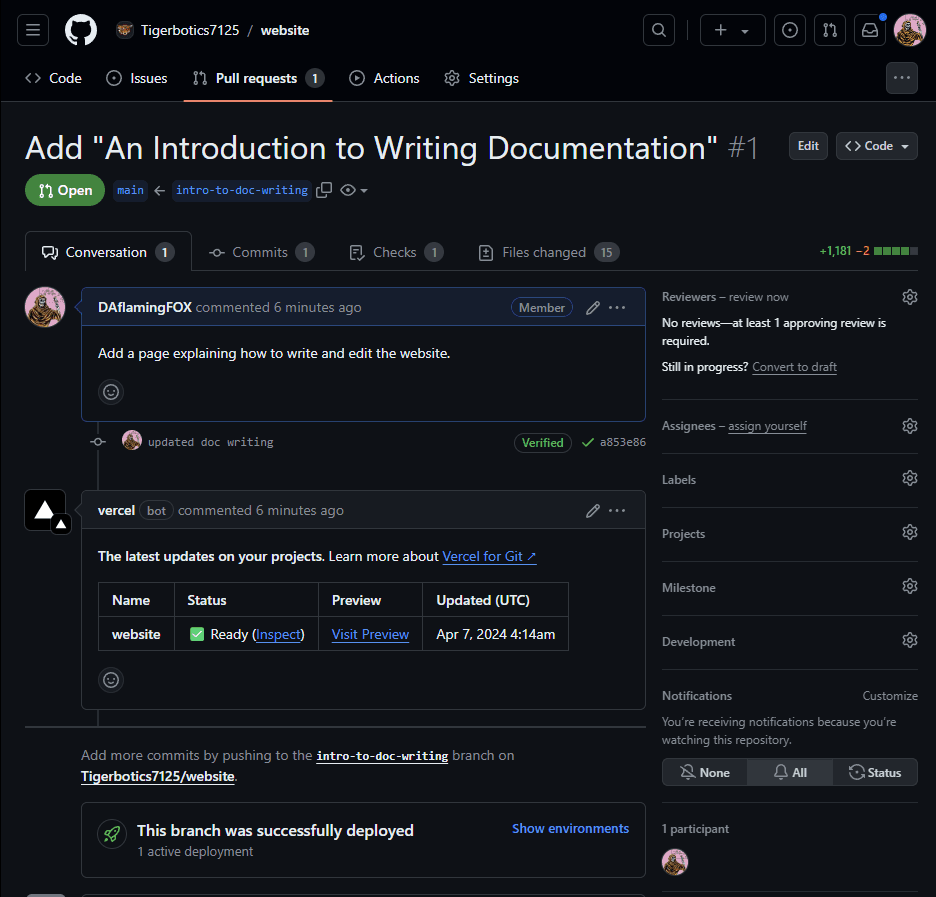
- If you decided you need to make more changes, and or you aren't actually ready for the pull request to be pulled into main, you should mark it as a draft, which you can do below the reviewers section.

- If you commit more changes to your branch (and push them), they will automatically be added to the pull request, where the vercel bot will build the website again, and you can preview your changes. This is your alternative if you cannot test the website locally on your computer.
Merging your pull request
In order to merge your pull request onto main (and get published on the website) it must pass the following checks.
- A review from an admin (either Jeff or Stover)
- The vercel build to not fail (why would we publish a broken website?)
- Any comments from the vercel preview to be resolved. (ensuring there is no debate on the page before it is published)